Essential Maneuvers for the Driving Test in 2022: From Signaling to Backing Up
Updated Nov. 30, 2021Now, it’s time to address the key driving skills you will need to maneuver your vehicle safely and avoid conflict with other road users. When it comes to practical driving maneuvers like steering, backing-up and signaling, the bulk of your learning will be carried out behind-the-wheel; there can be no substitute for actually getting out there and putting these skills into practice.
- Before you get started
- Positioning the vehicle
- Using vehicle reference points
- Steering techniques
- Backing up and reversing
- Acceleration techniques
- Slowing down and stopping
- Signaling your intentions
- Using driving lanes
- Entering and exiting highways
- Turning maneuvers
- Passing other vehicles
- Parking maneuvers
- Mastering driving maneuvers
However, getting to grips with essential driving maneuvers does require an academic approach, before you hop into the driver’s seat. Studying the information in this module will arm you with the theoretical knowledge needed to start learning to drive a car. As you progress, we recommend returning to this section of the course regularly to check that you’re on the right track.
Prior to booking your practical driving exam, you should take at least a few lessons with a qualified driving instructor, to ensure you are executing these driving maneuvers correctly.
Before you get started
When you take your driving test, the examiner will expect you to work through a comprehensive pre-drive checklist. The first article in this module will introduce you to this procedure, though you should also refer to the official DMV pre-drive checklist, to ensure you are completing each step correctly. The three main functions of a pre-drive checklist are:
- To check there are no obstructions around the vehicle (including people and animals) which would make pulling out of your parking spot unsafe.
- To make sure the vehicle is safe to drive. This will include checking for flat tires, fluid leaks and dirt on the windows or mirrors which may impair your view of the road.
- To make any necessary adjustments to the vehicle. E.g. altering the height of the driver’s seat or the angle of the rear-view mirror.
Once the pre-drive checklist is complete, you should check the location of a few essential components which are not necessarily covered in the list. The chances are that while taking your driving exam, you will be working with an unfamiliar vehicle. Therefore, you must ascertain where the controls for the lights, windshield wipers, horn and other essential components are before moving off, so you do not have to hunt for them while driving.
Positioning the vehicle
All public roadways are split into lanes. With exception of very rural roadways, traffic lanes are marked out using broken or solid pavement markings; you will learn more about what these painted lines mean in a latter module of this course. Learning how to position yourself within a lane is one of the first tasks you must tackle as a student driver. It is not simply a matter of positioning your vehicle in the middle of a lane, though this is the position you will occupy most of the time. There are five distinct lane positions to learn, each of which you will occupy for different reasons.
- Lane position 1: Centered in the lane.
- Lane position 2: Aligned to the left of the lane.
- Lane position 3: Aligned to the right of the lane.
- Lane position 4: Straddling the left dividing line.
- Lane position 5: Straddling the right dividing line.
Your default position is lane position one. If no upcoming changes in the roadway demand that you change position to maintain safety, this is the position you will occupy. Lane positions two to five will only be assumed when you are avoiding nearby hazards or preparing to make a turn.
Learning the different lane positions is the easy part. When you first start driving, maneuvering the vehicle into these positions is a challenge, as the vehicle itself will obscure your view of the roadway. Fortunately, we can use reference points around the vehicle to help us find the correct alignment.
Using vehicle reference points
Learning to position your vehicle appropriately when assuming a lane position, parking, or stopping at a traffic signal will take time. As the hood, trunk and doors of the vehicle block your view of the roadway, you will need a different set of visual car reference points to determine where you are in relation to other objects and markings. Those reference points are located on the vehicle itself.
As every make and model of car has its own unique size and shape, reference points may differ slightly from vehicle to vehicle. The information in this section of the module will help you to identify usable reference points on your vehicle. The principle behind car reference points is simple: from your position in the driver’s seat, you cannot see the surface of the road immediately around the vehicle, but you can see some external features of the car itself (such as the hood and headlights) and parts of the road slightly further away from the car (such as the curb and lane markings). Thus, you can line-up parts of the vehicle with what you can see of the roadway, to assume a specific position.
The main reference points we will discuss in this section are:
- The left headlight: you will use this reference point when parking on the left side of the road, preparing to turn left, assuming lane position two or aligning yourself with any left-side adjacent object.
- The center of the hood: this will help you park on the right side of the road, prepare for a right turn, assuming lane position three or aligning yourself with any right-side adjacent object.
- The side-view mirrors: these will help you position yourself correctly in relation to “STOP” lines and other forward obstructions.
- The door handles: these will help you position the vehicle correctly when looking over your shoulder to reverse the car.
Reference points will also help you share the roadway with vulnerable road users safely. If you know exactly where your vehicle is positioned in a lane, you can make sure that nearby cyclists and motorcyclists are given enough space.
Steering techniques
Vehicle reference points will help you to position your vehicle correctly in preparation for upcoming turns. How safely and efficiently you can execute those turns will depend on your command of steering techniques. Learning how to operate the steering wheel begins with assuming an appropriate hand position. We will cover the three generally accepted steering wheel hand positions in common use, along with advantages and disadvantages of using them. These are:
- The 10 and 2 position – the traditional steering wheel hand position, which affords good leverage and comfort.
- The 9 and 3 position – this position is slightly less comfortable than “10 and 2” but is safer, as it keeps the driver’s forearms away from the airbag deployment zone.
- The 8 and 4 position – more comfortable than “9 and 3” and equally as safe. Though, it does not afford the same leverage.
Now, let’s get back to executing those turns. Just as there are correct steering wheel hand positions, there are correct techniques for turning the steering wheel towards the left or right. The steering techniques explored in this section are all acceptable under certain circumstances. These are:
- Hand-to-hand steering, which involves feeding the steering wheel through your hands.
- Hand-over-hand steering, which involves crossing your hands.
- One-handed steering, where a single hand remains set on the wheel as it turns.
You should not be penalized for using any of these techniques during your practical driving exam, providing you do so appropriately. You will not fail for steering with one hand on the steering wheel when backing up the vehicle, though you probably would fail if you did it while executing a turn driving forwards. In this situation, steering with one hand is not necessary and would diminish your control over the vehicle.
Backing up and reversing
Reversing the vehicle will always be more challenging and dangerous than driving forwards, as your view of the roadway behind the car is extremely restricted. To see where you are going, you will need to turn your upper body in the driver’s seat, while still operating the controls in front of you. In real-world driving situations, you should avoid driving in reverse unless it is the safest option. As far as preparing for your driving test is concerned, we recommend practicing backing up the vehicle as often as possible. This essential skill will be assessed during the exam.
Do not start learning to drive in reverse until you are relatively comfortable controlling your speed and steering while driving forwards. When the time comes, the step-by-step backing-up guide in this article will help you. Keep in mind that your side-view and rear-view mirrors will be helpful when backing-up, though you must not rely on them exclusively. If you perform a reverse maneuver in your driving exam without turning to look over your shoulder, it is likely that the examiner will fail you.
Acceleration techniques
To increase your speed, you must inject more fuel into the engine by applying pressure to the accelerator pedal. It is important to increase pressure on this pedal smoothly and gradually, to maintain control and avoid “jerky” acceleration. In doing so, you should use the ball of your foot while leaving your heel firmly planted on the floor of the car. This will allow you to switch between the accelerator and brake pedal quickly, should you need to slow down.
Different roadway situations require different acceleration techniques. For instance, maintaining speed while driving uphill will require a gradual increase in pressure to the gas pedal, even though you are not trying to travel any faster. Hazardous driving conditions and entering a highway will also demand different acceleration skills, which are covered in this sub-section.
Slowing down and stopping
Applying pressure to the service brake pedal will slow the vehicle down. Just like acceleration, there is much more to safe and effective braking than simply pushing the pedal to the floor and hoping for the best. Even in emergency situations, slamming your foot down on the brake pedal is rarely the best course of action. How you must use your vehicle’s brakes will depend on the type of braking system your vehicle uses. Most modern vehicles are equipped with an antilock braking system (ABS) which manages braking force on behalf of the driver. If your vehicle does not have ABS, you must learn how to apply threshold braking techniques, to prevent the wheels from losing traction. All new drivers must familiarize themselves with this skill to a certain extent, as they may one day find themselves forced to drive a non-ABS vehicle, or a vehicle with ABS where the system has failed.
Mastering proper braking techniques is essential. If you use your brakes ineffectively, you may be unable to stop in a dangerous situation and will likely cause premature wear to your vehicle’s braking system.
Signaling your intentions
To share the road with others, you must learn to communicate effectively using your turn indicators, headlights, taillights and car horn. Learning hand signals will also be an important aspect of your driver’s education program, which we will discuss further down this page.
Your turn indicator lights are the signaling tool you will use most often. Their primary function is to communicate to other drivers that you intend to turn or change lanes, though they can also be used in place of your hazard lights in an emergency. Your turn signals should be activated a minimum of 100 feet prior to a turn and kept on until the maneuver is complete. If your turn signals malfunction, use hand signals instead.
Your taillights will come on automatically whenever you apply the brakes, communicating to other motorists that your vehicle is slowing. You can manipulate your taillights if a driver is tailgating or following a little too closely when you need to slow down. In this situation, attract their attention by gently pulsing the brake pedal to flash the taillights a few times.
Headlight flashing
Headlights can also be flashed to gain the attention of other drivers. According to most state driving handbooks, the only legitimate time to flash your headlights at another driver is when you must warn them that their high-beam headlights are active. If a motorist approaches you with their high beams on, you can let them know of the problem by flashing your own headlights at them a few times. If they do not respond by dimming their lights, avert your eyes to the right side of the roadway to avoid being blinded and do not retaliate by activating your own high beams.
If other drivers flash their headlights at you, check your own high-beam indicator – as this is likely the reason. If your high beams are not the cause, it could be they are warning you that your headlights are misaligned or that one is malfunctioning. Get them checked out by a mechanic as soon as possible.
The practice of flashing headlights to warn other drivers of a speed trap or police presence on the road is common around the United States. We strongly recommend that you check your state driving manual for information on this topic. In some states, it is illegal.
Hand signals
If your turn indicators or taillights are malfunctioning, you must communicate your intention to turn, slow down or stop using hand signals. They will also come in handy on extremely sunny days when your signal lights are difficult to see, and when your indicators are obscured by a line of traffic. Never use hand signals at night, as you will not be seen. If your signal lights are not working, you simply cannot drive after dark.
All signals must be executed through your left window, as described here:
- A right turn: Extend your left arm out and bend it at the elbow, with the hand pointing upward.
- A left turn: Extend your left arm straight out with no bend. Your hand should be pointing to the left.
- Slowing or stopping: Extend your left arm out and bend it at the elbow, with the hand pointing down towards the roadway.
Do not neglect hand signals during your driver’s education program, as you will need to recall them more often than you think! Most drivers are fortunate enough never to need hand signals themselves, but they must still recognize them. Cyclists do not have signal lights and will always use hand signals to communicate.
Using your car horn
Your car horn is an extremely powerful communication tool which you must take care not to overuse. Many drivers are far too quick to sound their horns in anger, frustration, or simply to greet other motorists. The car horn was not intended to be used as a means of self-expression, but as a last resort when you absolutely must get another driver’s attention.
Whenever you sound your horn, you run this risk of startling other road users and causing an accident. Only use your car horn when it is necessary to protect yourself or other road users from harm. For instance:
- When you must warn another motorist that they are about to hit you.
- When you have lost control of your vehicle and must warn other drivers away.
- When you need to scare an animal off the roadway to avoid a collision.
- Some states permit gentle use of the car horn in low visibility conditions and when approaching blind curves. Check your manual for details.
Never use your horn to express frustration, urge other road users to move or travel faster (unless to avoid a collision) or to greet another driver. You must also avoid using your horn when horses and horse-drawn vehicles are on the road, unless it is absolutely necessary.
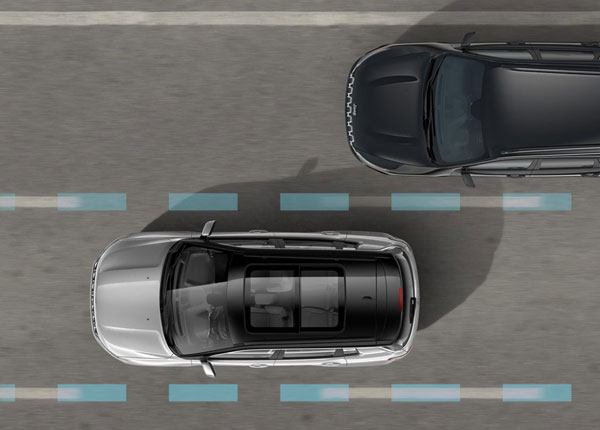
Using driving lanes
Learning to anticipate and prepare for upcoming lane changes is one of the most important skills you will develop as a student driver. On a two-lane road with traffic moving in both directions, knowing which lane to occupy is easy. Things get a little more complicated on multi-lane roads with traffic lights, interchanges or multiple streams of traffic moving in the same direction. Fortunately, the rules for choosing the correct lane under such circumstances are some of the simplest you will learn throughout your studies. Our “Using Driving Lanes” module will talk you through it.
In most situations, the rule you need to remember about picking a lane on a multi-lane highway is keep right. The right-hand lane is reserved for the slowest moving traffic on the road and is usually the lane you must occupy if you intend to turn off at an upcoming junction. If you need to pass another motorist or make way for new traffic entering the road, you should merge left into an adjacent lane.
You must learn to plan your lane changes carefully, avoiding all but the most necessary of situations. As merging into a new lane will disrupt the situation on the roadway around your vehicle, it always increases the level of risk you are exposed to while driving. There is a correct strategy for changing lanes, which we break down into easy-to-follow steps in this section. Changing lanes without following this procedure is dangerous and could lead you to fail your driving test, or land you with a traffic citation if you are already qualified.
Joining a new lane of traffic (usually when entering/exiting a roadway) is known as merging. Just like changing lanes, merges must be executed in accordance with certain safety rules. While you are a novice driver, focus on looking for a four-second gap between vehicles to accommodate your car. There are times when you may need to enter a smaller gap, but for now, this is the rule you must remember.
Entering and exiting highways
Merging onto high-speed limited-access highways is challenging and should only be attempted by competent novice drivers. In order to merge safely, you must use the acceleration lane to build-up your speed to match that of existing traffic on the road. Exiting the highway is arguably simpler, providing you prepare for your exit effectively. Never cross multiple lanes of traffic at the same time or make a rushed merge into the deceleration lane. It is better to miss your exit than cause a collision.
Turning maneuvers
Making turns safely and effectively requires solid steering control skills, an understanding of different lane uses and knowledge of the road rules on that stretch of road. In our full “Making Turns” section, we discuss the two main types of turn you will need to make while driving:
- Turning at intersections (which may involve turning left, turning right, making protected or unprotected turns, using a center-left turn lane and obeying traffic signals)
- Reversing your direction of travel (making a U-turn, two-point turn, or three-point turn to point your vehicle in the opposite direction)
With the information covered in this block of the course, you can learn how to perform all basic turning maneuvers confidently and safely. Where intersections are concerned, you must never assume it is safe to execute the turn. Always scan the roadway thoroughly for opposing streams of traffic, even if a traffic control device indicates that you have right-of-way. Motorists make silly mistakes at intersections every day. If this happens, your vigilance and caution may be the only thing standing between you and a collision.
Passing other vehicles
Passing another vehicle may involve temporarily entering a lane of opposing traffic. Even on relatively clear roadways, there is a lot that can go wrong with this maneuver. Passing another vehicle simply to “get ahead” is an unnecessary risk – do not do it. Though, as there are some situations in which passing is the safest course of action, you must know how to execute a pass safely and legally.
In addition to working through the information in this module, check your driver’s handbook for the laws which dictate when you can and cannot pass another vehicle in your state. In general, passing is illegal if:
- You cannot clearly see the road ahead for at least 800 feet.
- You are driving through an intersection or are within 100 feet of an intersection (some variations on this law in different states).
- You are within 100 feet of a tunnel, bridge or railway crossing.
- You are behind a stopped school bus.
- Traffic control devices indicate that passing is illegal on this stretch of road.
If you have confirmed that it is legal to execute a pass on a stretch of road, you must then ask yourself: is it safe and is it worth it? When you are certain you should proceed, the step-by-step passing guide in this course will talk you through the maneuver. Make sure you are comfortable with this information before attempting a pass in a real-world driving situation!
Parking maneuvers
Learning when, where and how to park are essential skills often overlooked by novice drivers. The “Parking” section will brief you on every vital parking rule you must know, before attempting to park your vehicle on a public roadway. In every state highway code, there is a distinction made between parking, and temporarily stopping to load or unload the vehicle. You should check your state handbook for local information on this issue, to avoid breaking the law. In many situations, stopping temporarily is legal whereas parking the vehicle is not. The information we provide covers parking rules and restrictions as they apply in most areas, though there may be some subtle differences in your city or state.
There are several parking maneuvers you must learn, to be equipped to park your vehicle appropriately in different situations. These are:
- Perpendicular parking: the vehicle is positioned at a 90-degree angle relative to moving traffic.
- Angle parking: the vehicle is positioned at a 45-degree angle relative to moving traffic.
- Parallel parking: the vehicle will be parallel with moving traffic. These spaces are usually found along urban streets.
- Parking on a hill: the vehicle is parked on a slope pointing uphill or downhill. This requires additional safety considerations.
Parking can be a frustrating endeavor, even for experienced motorists. Where possible, you should consider selecting a “less convenient” space that is farther from your destination, to avoid the stress of trying to find a parking space at the last moment.
Mastering driving maneuvers
Do not expect to read through the information in this module once and have all the information you need committed to memory – there is a lot to take in! Until you have mastered these essential driving maneuvers, you should revisit this information as often as possible.
Keep in mind that a lesson or two with a qualified instructor is vital, if you hope to pass the driving exam the first time. In addition to helping you form safe driving habits, driving instructors are trained to get you through the assessment. You will stand a much better chance of passing and will benefit much more from the rest of your driving practice, with a little guidance from a certified instructor. If you are ready to start learning, let’s begin, with a run through that pre-drive checklist.